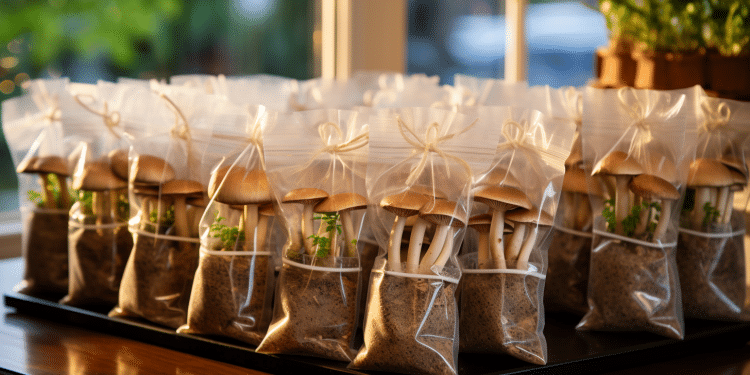
Mushroom grow bags are a crucial cultivation tool, for the seasoned grower as well as for the passionate amateur. They can be used as starter bags, wherein a bag is used for sterilizing grains and promoting a mushroom culture, alternatively, can be used to make supplemented blocks of wood chips to grow specialty mushrooms. If you are growing mushrooms, you will want to get acquainted with grow bags.
What Is A Mushroom Grow Bag?
When people say “mushroom grow bag,” they are generally talking about an autoclavable gussetted polypropylene filtering sack.
OK, I will admit, that’s a lot of strange sounding terms. Let me break that one down.
Gusseted just means how a bag is folded, the sides of the bag folded down to be flat toward the interior. One of the reasons for this is purely to allow the bag to be folded smaller and lay flatter, but can be opened wider to accept large amounts of wheat or sawdust. This shape is also pretty handy when sterilizing, when a grower can slide in a filter in the gap between the sides.
Learn more: Mushroom fruiting chamber
This keeps contamination out of the air entering the bag as it cools after sterilization.
Autoclavable simply means the bag can handle the high temperatures in the autoclave, or sterilizer. Typically, that takes the form of a 15-pound-per-square-inch (PSI) pressure cooker, which subjects the bag to temperatures around 250 degrees Fahrenheit, sometimes for hours at a time.
Bags that are not designed for this will probably melt.
Polypropylene is the material that bags are made from. It is a “thermoplastic” that does not melt unless temperatures are maintained between 266 and 340 degrees F. This makes it a perfect candidate to keep your grains or wood chips in while you sterilize.
A pressure canner will not see these temperatures until it is pressed past 25 pounds per square inch, well above the safety limits of a home grower.
Filter patch relates to the filter at the front of the sack, which is one of the more helpful aspects. The filter allows for fresh air to enter into the bag, but not through contaminants such as mold spores and bacteria. Without fresh air, a mushroom culture will eventually stop growing, but if the bag is simply left uncleaned once it is been disinfected, contaminants will take over rapidly. Filter patches are a perfect solution.
How to Use A Mushroom Grow Bag
There are a lot of amazing ways that you can use a mushroom growing bag to cultivate mushrooms. The most common uses are for starter bags and for a fruiting sawdust unit. Mason jars are good for making the first-generation wheat spawn, or for just running a trial run, but if you are making a lot of wheat spawn, you are far better off using the grow bag.
Learn more: Mushroom growing supplies
Spawn Bags
Having your spawn in a grow bag allows you to break down the spawn more easily so that it can be mixed around and accelerate colonization. It also makes it easier for you to distribute your spawn on the mass media.
Anyone who has tried pulling a colonized well-behaved spawn from a cereal bowl knows it just does not want to get out sometimes. You wind up scooping it out using a spoon, risking contamination in the process. Pictured, trying to extract that stubborn tomato sauce from the glass bottle. Spawned packets are the solution to that.
You can typically get 5lbs of spawn into one big spawn bag, which is the perfect amount, from my experience. It is enough to make one small straw log, or several fruit blocks. You can even use this to seed another ten spawn bags!
Fruiting Blocks
Filter patch grow bags are a must-have tool to create sawdust fruit blocks. A larger bag will generally produce 5lb fruiting blocks, including weight from your starters. The bag allows for easy mixing of spawn once it is inoculated, while a filtering spout allows for the fungus culture to breathe as it grows through the sawdust.
Once your mushrooms are completely encapsulated inside of the bag, you can either cut holes, or “X’s”, into the sides of the bag, or completely cut the top off the bag in order to re-fruit your mushrooms. Cutting your bags at various heights at the edges will give you a bit more fine-grained control of the humidity on the growing unit.
Using the Bag for Fruiting
Another way of using the grow bag for mushrooms is as a mini grow room! The top part of the bag makes for a moist dome where mushrooms can produce their fruits. Keep in mind there is not going to be much fresh air in the bag, so if you are using a bag for fruiting your mushrooms, make sure to frequently open up the top of the bag so that there is enough fresh air exchange. Make sure you don’t open the bag until your blocks are completely populated, otherwise, there is a good chance that your bag may become contaminated.
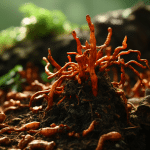
Some mushrooms will grow inside of the bag in an interesting manner, particularly the reishi mushrooms. In the high-CO2 environment inside a bag, the reishi will grow longer, more-twisted “antlers” rather than more familiar flat bill shape. If you allow reishi to grow long enough, it will eventually produce directly through the filter!
Reusing Bags
While you will likely want to start out with a fresh bag for making fruit blocks or propagating seed packets, you can always re-use your bags for other purposes, provided that you did not cut your bags open to harvest fruit. For instance, using your spawn bags makes an excellent container to pasteurize small batches of layered cases over a cooker.
Simply fill a baggie full of casing layer, then place in a hot water pan on the stove. You might have to put something heavy over the top of the bag to keep most of it below the water. You could also reuse the bag to create miniature straw bales rather than using a poly tube. Just fill a clean bag with some pasteurized straw and a wheat starter as you would normally do for growing mushrooms in straw.
You can reuse the bag again to spawn or for a fruiting unit, but after several sterilizations, the bag integrity and the filtration patches will decrease, so it is best to use fresh bags to decrease your chances of contaminating.
Filter Size on The Bags
When buying your spawn bags, you will want to look at the contents listed on the filter.
Typically, filters will come with a micron rating. This merely describes the pores size of the filter. The sizes usually range between 0.2 and 5 um.
If your bags are going to be used for Fruit Blocks or Spawn Bags, you want to aim for the smaller micron sizes, not higher than 0.5 microns. This will be necessary to properly shield your substrates from contamination. Mushroom bags with 5 micron filters will allow more gas exchange, but likely lead to much higher levels of contamination, and are discouraged for use in sterile growing.
Different Bag Size
These bags are usually available in different sizes. The size bag that you need clearly depends on how much substrate grain you wish to place into your bag, and on other factors like the size of your steamer. In my experience, a large-sized bag is definitely more helpful.
To give you an idea, an 8-inch wide, 5-inch deep, and 18-inch high bag would hold a 5-pound supplemented sand powder and wheat sprouts comfortably. You can just put 6 bags like this into your presto pressure canner.
One of the concerns with using bags of mushrooms, particularly in a commercial, large-scale operation, is the cost to the environment. Polypropylene bags are not very green, and end up being an enormous waste product after only a short time. Some growers are investigating using biodegradable bags for mushrooms, though nothing is commercially available right now that rivals the efficiency and usefulness of an autoclavable filter-patch grow bag made from polypropylene.
There are many places where grow bags can be found on the internet, though most come from a few small suppliers based in China.
Thickness
The bags come in various different thicknesses, with 2.2 to 4.0 mm being a common range. Bags that are 2.2 mil thick will perform well, but you can expect that a small percentage of the bags will tear through during regular handling. If your bags do tear after being sterilized, your bags are likely contaminated. Thicker bags are less prone to tear, but they do come with a higher cost. My advice is to opt for thinner bags, at 2.2-millimeters, and to be smart about how you handle the bag.
After inoculating a growing bag, you will want to seal the top before placing it on your shelf to colonize. There are a couple of simple ways to do that. The easiest way is with little pieces of wire. After you have injected your starter into a bag, twist the top of the bag rapidly, then tightly wrap wire over the twist. You can use something like this, or any type of steel wire you find at the local hardware store.
You can also use zip ties, which are fast and simple, but far less convenient. Of course, you can always step it up a notch and use a burst sealer. If you are juggling high volumes of bags, an impulse sealer would save some time and energy, but it is probably not worth the expense for smaller-scale growing.
Updated 10/3/2022
