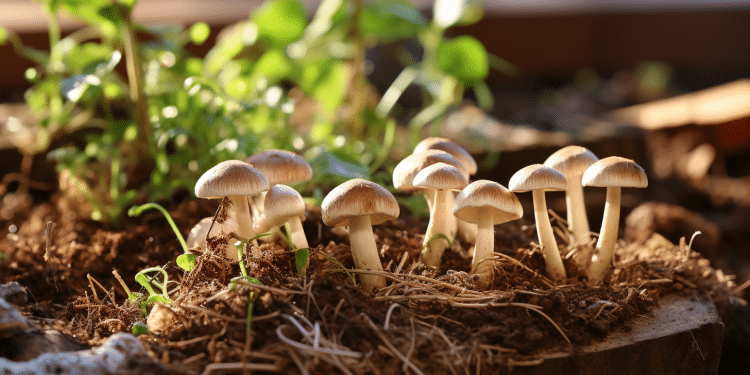
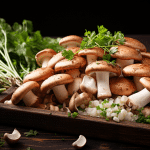
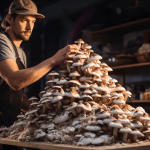
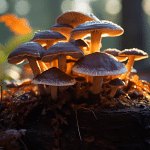
Growing mushrooms in straw is one of the easiest and most useful ways of growing food in your house. You can get started with a mushroom starter kit, or better yet, create your own mushroom logs and grow mushrooms in your own back yard.
With a bit of gear or supplies, you can grow more tasty gourmet mushrooms than you will know what to do with. The process involves inoculating a distilled straw with a fungus spawn kernel, allowing the mushrooms to colonize the straw, and placing your mushroom logs into an environment suitable for the fruiting bodies to grow.
The Steps to Growing Mushrooms in Straw
- Chop, soak, and post-ferment the straw at 65-82degC for 1 to 2 hours.
- Drain straw, chill, and stir into spawned mushrooms grains with a minimum of 10% mushroom spawn ratio.
- Place the straw/spawn mix into the proper container where the fruiting body will grow.
- Allow to grow in a room temperature environment. Taking between 7 to 14 days.
- Move into the fruiting chamber or other suitable medium to begin growth of the mushrooms fruiting body.
- Harvest!
Things You Will Need
- Straw, either wheat straw or oat straw, in reasonable condition.
- A way to pasteurize. I like to use a propane burner and large drum.
- Mushroom grain spawn. Choose a mushroom species that grows well on straw.
- Fruiting container like a 5 gallon bucket with holes drilled into the sides.
1. Choosing the Mushroom You Want to Grow
What types of mushrooms can be grown indoors using straw?
A Many different types of mushrooms will grow on straw, but the most useful to grow is Oyster Mushrooms.
They are easy to grow, colonize quickly, and produce lots of fruit. Oyster mushrooms come in a variety of forms, including blue, pink, yellow, pearl, and king oyster. All of them have slightly different ecological preferences, with some being more fruitful or faster at consuming straw than others. Most edible mushrooms also thrive well on supplemental sawdust.
Blue oyster mushrooms will quickly colonize the sawdust and produce a really good yield, but they need plenty of fresh air in order to grow big, meaty caps. This makes them better for growing outdoors in an unrestricted supply of fresh air. They do prefer cool weather, generally fitting in milder climates.
Yellow oysters do not need as much cool air as blues, so they are better suited for growing in the house. They are a tropical species that thrives at room temperature. Yields will be smaller than some other varieties, since this mushroom produces a lighter, subtle, yet gorgeous, rosy-yellow bouquet of mushrooms.
Pink Oyster mushrooms are incredibly quick to produce, typically ready to harvest in 10-12 days after the straw log is made. They are heat resistant, requiring little or no outside air. Spore burdens can be pretty high on these mushrooms, and you need to have a sharp eye to pick them at the appropriate time.
King oyster mushrooms will grow fine in straw, but they are noticeably different from the other varieties. They can also take a bit longer to produce. This species tends to make larger single mushrooms instead of clusters. If grown indoors, they tend to have larger stems and smaller caps, whereas grown outdoors, the caps are larger and the stems are much smaller.
Learn more: Growing mushrooms from grain spawn
Once you decide on the species you want, you can order the spawns or you can grow them yourself. Making your own grain spawn requires a little bit of know-how and some specialized gear, but it is an enjoyable and useful experience all on its own. The easiest way to make your own, though, is to buy your spawn from a reliable vendor. You will need around 3-6 pounds of completely populated spawn per 30-pound bale.
2. Preparing The Straw For The Growing Process
Chop it Up
You can grow mushrooms using various types of straw, but wheat or oat straw seems to be the most effective. Once you have got a bale of straw, the best thing to do is to cut your straws into smaller pieces, 1 – 3 inches. For smaller amounts, you can use a pair of shears on the straw, but if doing larger amounts, I have found that chopping several sacks of straw at once is easier with weed whackers.
Wash and Soak the Straw
This step could be skipped, but I found that soaking my straws with dish soap in a big sack was beneficial.
Use roughly the amount that you would use for washing dishes.
This seems to decrease bacterial loads in the straws, reducing contamination chances. To give mushrooms an edge against molds and bacteria, it is necessary to heat the straw to a certain temperature range.
Proper Pasteurization
Proper pasteurization will, essentially, allow a mushroom culture the window of opportunity to colonize the straw before contaminants get a foothold. The easiest way to do that is with a hot water bath.
For smaller amounts of straw, fill up an old receptacle with your straws, then add warm tap water. Add weight above your straw to keep it steady. Once you have covered the straw, add boiling water until your water is over 65 degrees celsius. Use a thermometer to keep an eye on the temperature.
Let it sit in a warm bath of water for 1 -2 hours. Add more boiling water if it drops below 65 degrees celsius. For larger amounts of straw, a food-grade drum fitted with a propane burner may be used.
It gets water cooked for about 30 minutes. Stuff the wicker baskets with straw, put them into barrels, fill them with water, and turn on heat until it gets to over 65 degrees C. Try to keep it between 65-82 degrees celsius for 1 -2 hours.
Learn more: Growing mushrooms on sawdust
Drain and Cool Pasteurized Straw
Once proper pasteurization is completed, strain the snifter out and let cool completely. Rapid cooling can be achieved by spreading your straw on a clean, smooth table. Try to keep things clean by thoroughly wiping down surfaces here, and by disinfecting hands with alcohol or by washing them thoroughly and frequently.
Pay careful attention to where contaminants may be coming from.
3. Adding the Spawn to The Logs
In this step, you are adding the spawned grains into straw. Using a higher spawn:straw ratio will speed up the colonization time, which increases the chances of success. I like using 3lbs of spawn per 20lbs of wet straw, or about 15% of the ratio. Using less than 10% significantly increases your chances of contaminating.
Mixing the Spawn
Use a big jar, or table, to stir the straws well, and mix well. Try to make a nice, thorough spread. Also, be sure that no pockets are left with straws packed in, which are still too hot after pasteurization. Again, make sure hands are sanitized or using nitrile gloves.
Adding Mixture Into Containers
Now you will want to put your mixture in an appropriate container. Many things work, including a clothes hamper, 5 gallon buckets with holes punched into the sides, plastic bags, etc.
I have found that a better option for containers is using tubing: It is versatile, you can monitor the colonization, you can easily find contaminants, and you can make a logging rig of whatever length you need. Also, the tubing shapes provide lots of surface area for fruit, you can slit any holes you like, or even slit holes if you spot unwanted studs underneath the plastic.
Using 16-inch flat-sided poly tubing will get you a log that is around 10.5 inches thick, a perfect size. Going too large will result in an anaerobic core, ultimately leading to a contaminated log. Tie the tube at the end with a piece of string or a zip tie, then fill with your mixture, a tablespoon at a time.
Press down on it as you go, packing the tubing tighter than it will fit. This will keep any air pockets between the straw and tube from forming — thus keeping mushrooms from getting stuck underneath the plastic. Once your tubing is at your desired length, squeeze all of the air out of the logs by pressing hard and twisting over the top of the tubing.
Tie the top back on again using a piece of wire or a zip tie.
Add Holes for the Fruiting Body to Grow Through
You will want to drill holes in the sides of the logs for two reasons. First, your mushroom log needs to be airborne in order to grow. If holes are not punched, then it is inevitable that you will get contaminated. Also, your mushrooms will end up growing out of those holes.
It is like the way they grow naturally. The plastic acts as bark on the tree protecting the mushrooms, and the holes are similar to the bark chinks, where the organisms feel fresh air and the possibility of fruiting, and ultimately spreading the spores.
Use your blade to make little Xs, spaced at a distance of 5 inches, around the whole bag. You can also use a needle for quick holes. Make sure that your blade or arrowhead is sanitized with alcohol first to avoid introducing contaminants to your log. If you are planning to hang the log, poke some holes at the bottom of the log as well to allow extra humidity to escape.
4. Colonization of the Straw and Fruiting Body Growth
At this point, all of the heavy lifting is done.
It should take around 7-14 days for your mushroom cultures to completely colonize your logs, depending on the temperature. Logs are best incubated at room temperature and kept out of direct sunlight.
Check your logs every couple of days to make sure that colonization is progressing and that contaminants are kept at bay. If you are doing multiple logs, be sure that they are not packed closely together throughout the incubation. They generate heat when colonizing, and if they become too hot, the mushroom cultures will die, and the logs will become contaminated.
If you notice a foul odor or colored growths on the log, then it is probably contaminated, and would be best thrown into a compost pile or trash. However, most likely, all you will see is beautiful, white, fungus growth. Once your whole log is covered with white mycelium, you are ready for the fruits. If it is under the right conditions, or outdoors, the fruits are very likely to appear naturally.
You will see pins, or small, teenager-sized fruit bodies, first appearing in holes cut into plastic. These mushroom fruit bodies will grow fairly quickly, sometimes double in size each day!
Try to keep mushrooms from drying out while growing, this can be accomplished by spraying regularly. If growing indoors, you might have to incite the fruits by changing environmental conditions, that is, by introducing light, reducing the temperature a bit, and increasing humidity.
You may have to construct a grow room in order to keep conditions ideal, but if you keep up a regular misting schedule, you may have success with growing inside in regular living room conditions. There are a lot of different options out there for an indoor grow room, and it might take a post of its own to cover them all.
