Steps to Build a Mushroom Fruiting Chamber
Step 1: Decide The Design and Size of The Fruiting Chamber
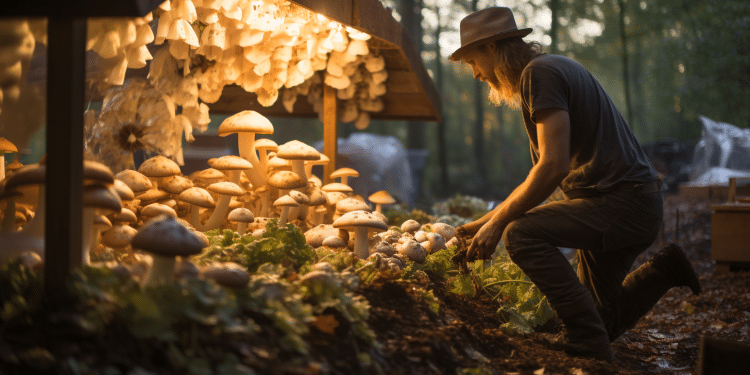
Before you begin building your mushroom fruiting chamber, first, you will have to decide on the dimensions and the mushroom fruiting chamber design. This will all depend on the scale of your operation and how many mushrooms you wish to harvest per week.
The dimensions are up to you, but we believe 25 feet by 15 feet (about 8 meters by 5 meters) is a good starting point for a serious commercial operation. That would give you plenty of room to grow around 150 to 200 pounds (about 68 to 91 kg) of mushrooms a week.
You should also have a basic idea how you would like the racks laid out within your grow room. Remember, you are going to want space for maneuvering, picking mushrooms, and carrying them around. You will also want a room that is easily cleaned. Also, you will want to decide where the exhaust vents are going to be.
Step 2: Prepare the Basic Structure of The Fruiting Chamber
To prepare the room for a fruiting chamber, make sure that your floor is clean and free from sharp objects that could harm the tent. Then, go to work building your setup.
Step 3: Install Shelving and Inside Structure
The number of shelves that you need will depend on the size of your grow room and the type of shelves available in your local area. It is difficult for us to provide a fixed formula that you should follow, because shelves can vary so widely. So, you are going to have to do some math and figure out what is going to be the most effective use of space for your grow room. Shelves typically come in either plastic or wire.
Learn more: How much spawn to substrate
Plastic shelving is lighter weight and easier to move. Wire shelving is stronger and holds a larger amount of weight. Plus, they are easier to clean. However, they can get rusty in high-humidity environments unless made from the right materials.
You can get around their heavy weight by buying shelves that are made on wheels. Another advantage to metal shelving is that it is sturdy enough to hold hanging bags from it, rather than simply putting them down flat on a shelf. So, that way, it may provide a little bit more flexibility. Wooden racks are not recommended in a grow room because they quickly start warping and decaying due to high humidity.
Step 4: Add Lighting Fixtures
We found LED light strips worked better for what we needed. They give you enough light for what you are doing, but they are not overpowering. Plus, they are extremely energy-efficient.
Step 5: Install Ventilation
Your grow room will require fans, as well as ventilation vents, which will push out the stagnant air from your room, as well as introduce fresh air. If your chamber is installed within an existing structure, you will also need a way to move all of that extra humidity out the door, as well.
Learn more: How to grow mushrooms in your backyard
Step 6: Install Water and Electric
You will want to put a hose in the wicking chamber and also have a sort of mister or fungus wicking humidifier spraying the air with water. You will also need to run electrical power into your chamber. You will need it to run the fogger, fans, as well as any timers and other hardware. You do not necessarily have to hire an electrician, and this can be as simple as running an extension cord from your existing power socket.
Step 7: Install Automation Equipment
Without having a sort of electronic “brain” for your operations, you are going to need to monitor CO2, humidity, temperature, and light manually in your grow room. You will want to have a thermostat, along with humidity and CO2 controllers, which can turn fans or water on and off automatically if specific conditions are met. It is also good to have the lights on timers, so you will never forget to turn them on or off.
Even with those features, you still need to spend around 10-15 hours a week growing 20 pounds (about 9 kg) of mushrooms on a regular schedule. So, do not throw extra tasks into the mix and make things harder than they have to be.
How Do I Raise the Humidity in My Mushroom Fruiting Chamber?
Spray Bottle
Using a spray bottle and hand-misting the mushrooms is the most basic method of adding additional humidity in the growing room. It is extremely inexpensive and simple. This is the one we recommend to folks buying a mushroom kit.
It is also really time-consuming and labour-intensive. In a smaller room, you can probably get by with just a spray bottle. For larger operations, though, this quickly becomes a pain in the arm!
Wicking Humidifiers
These are the least expensive types of mushroom fruit chamber humidifiers, and are the next step up from using a spray bottle. These humidifiers work by vaporizing water in air. The water is drawn out of the tank and then is forced through a fan to reach the air. This type of humidifier would work great in a smaller room. They are limited to the amount of moisture that they can increase in air, however, and are not a great choice for larger rooms.
Ultrasonic Humidifier
This is the next step up from a wicking humidifier. Ultrasonic humidifiers use rotating disks to vaporize droplets of water, and then expel them back into the air. This is a far more effective way of adding moisture to your grow room, and it works well for larger areas. They are extremely effective, and you probably will only have to run it a couple minutes every hour. Humidity is one of the biggest factors that you will have to manage in your grow room.
When the humidity gets too low, your mushrooms and substrate will break. Or, if they get too dry, they just die, not growing at all. If things are getting too wet, that could cause problems too, for bacteria and mould. More often, though, growers have trouble keeping the humidity up enough.
How To Use A Mushroom Fruiting Chamber
If you set up your mushroom fruiting chamber with all of the features that we listed above, then most of the time, it is going to be running on autopilot. Humidity, temperature, CO2 levels, and lighting should be automated for you. You might have to make a few adjustments at first to figure out what parameters yield better results. After that, it is mainly just a matter of watching nature do her things.
All you have to do is continue adding fresh bags of completely populated mushrooms into your spawning chambers, and allow them to grow. You can grow oyster mushrooms, shiitake, lions mane, and many more mushroom varieties using a fruiting chamber.
Check on your mushroom fruiting chambers regularly to ensure that all is still working properly. If any equipment stops working, you want to get right into fixing it before you spoil an entire batch of mushrooms. Watch your mushrooms and pick them at their optimum picking times simply by twiddling bunches of mushrooms out of their bags.
Common Issues with Building, Using and Maintaining Your Mushroom Fruiting Chamber
Do not Make It Airtight: Your grow room should be able to keep humidity and minimize external contaminants. If your chamber is not sealed well, then keeping the environment moist enough is going to be a challenge.
Too Much or Too Little Moisture: If it is too dry, the mushrooms won’t grow. If it is too wet, you run into problems with molds and contaminants.
Too little air or too much: Mushrooms require high amounts of CO2 when they are growing, but lower amounts when they are ripening. Too much CO2 may adversely impact the growth of the mushrooms during the pining process. Not having sufficient air circulation also causes large amounts of spores to accumulate in the apical chamber. This may even cause problems with mould.
Too Hot or Too Cold: Like most living things, mushrooms have a preferred temperature range for their mushroomy fruiting chambers, where they prefer to remain. Either too warm or too cold temperatures negatively affects their growth.
Too Much Light or Not Enough Light: Mushrooms require a certain amount of light in their growing chambers in order to signal it is time to grow. They won’t begin growing in pitch black. However, you don’t want to overload them with bright fluorescent lights, either. Aim for a light level that is similar to a cloudy fall day, mimicking the way they’d grow naturally.
Water standing: Condensation may cause water to pool, creating pools on the ground. You will need to have some sort of drainage system in place to move the excess water away from your grow room.
Tips for Maintaining Your Mushroom Fruiting Chamber
As mentioned, make sure you are using the technology that will allow you to automate the growing room. Take the manual tracking and guesswork out of the equation. Use thermometers, CO2 meters, moisture sensors, fog machines, and other technologies. That way, if some parameters drop out of the range that you wanted, they are instantly adjusted back in.
Get in the habit of cleaning out your fruiting chamber every time you take out the old bags before adding the new ones. Spores, mold, mildew, and other contaminants build up over time in your fruiting chamber.
We suggest growing in batches and harvesting at one time. That way, when you have finished your bags of fruit, you can pull them out all at once and get a nice cleaning of the fruiting room. Scrub down the shelves and walls with a diluted bleach solution to eliminate any fungus or bacteria naturally present. For larger operations, you may want to run several rooms with staggered schedules to ensure no disruptions to the production of mushrooms.


